This tutorial will show you how to install Node.js using three different options on your CentOS/RHEL 8. You can adopt any of the following methods to install Node.js on your system.
Prerequisites
To follow this guide along, you will need one (physical or virtual) machine running CentOS/RHEL 8 with a non-root user sudo privileges.If you are running RHEL 8, you will need to add to extra packages for enterprise Linux (EPEL) repository to install nodejs using the dnf package manager.
Install Node.JS using DNF
There are multiple nodejs versions available, and you can choose between them by enabling the appropriate module stream on your system.First, check the available streams for the nodejs module using the below command:
You should see below output:
As you can see, two streams are available, 10 and 12. The [d] indicates that version 10 is the default stream.
For instance, If you’d like to install Node.js 12, switch module streams to nodejs:12 with below command:
Type below to install the nodejs with below command:
Check that the install was successful by querying node for its version number:
You will see output similar to the below:
When you install the nodejs using dnf package manager, the npm Node Package Manager utility will automatically be installed as a dependency.
You can verify whether npm was installed with below command:
This will print the npm version like below:
At this stage, you have successfully installed Node.js and npm using the dnf package manager on your CentOS/RHEL 8.
Install NodeJS using nvm
This section will show you how to install the nodejs using Node Version Manager (npm) on your CentOS/RHEL 8. The npm allows you to install and maintain many different independent versions of Node.js, and their associated Node packages, at the same time.To install NVM on your CentOS/RHEL 8 machine, visit the project’s GitHub page.

Copy the curl command that displays on the main page. This will get you the most recent version of the installation script.
The script clones the nvm repository to ~/.nvm, and attempts to add the source lines to the correct profile file (~/.bash_profile, ~/.zshrc, ~/.profile, or ~/.bashrc).
To use it, you must first source your correct profile file like below:
Now, you can check which versions of nodejs are available:
You should see output similar to the following:
You can install a version of Nodejs by typing any of the released versions you see. For this guide, we will install version v13.6.0 using the below command:
You can see the different versions you have installed by typing:
This will return you similar to the following output:
The output shows the currently active version on the first line, followed by some named aliases and the versions that those aliases point to.
Note: if you also have a version of Nodejs installed through the dnf package manager, you may see a system -> v12.13.1 (or some other version number) line here. You can always activate the system version of Nodejs using the nvm use system.
Additionally, you’ll see aliases for the various long-term support (or LTS) releases of Nodejs:
You can install a release based on these aliases as well. For example, install the latest long-term support version, erbium, with below command:
You will see output similar to the following:
You can switch between installed versions using the nvm use followed by version:
This will return output similar to the below:
Install Node.JS using Source Code
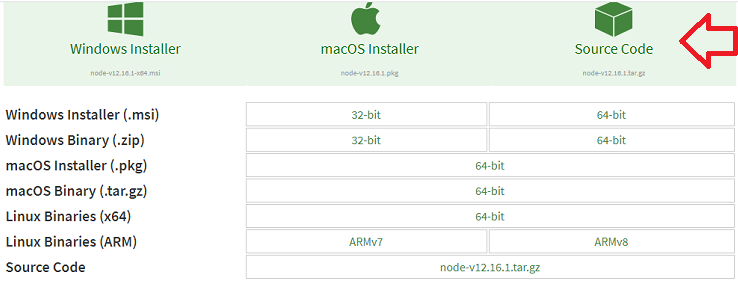
This section will show you how to download, compile and install Node.js using source code.Open up your preferred web browser, navigate to the official Node.js download page, right-click on the Source Code and Copy Link Address.

Return to your terminal session, download source code using curl in current user’s home directory:
Now, you can configure and compile the nodejs source code:
When the compilation is finished, you can install nodejs on your system with below command:
Type below to verify that the installation was successful:
If the command return the correct version number in the output, then the installation was completed successfully.

No comments: