Cyberthreats are increasing with the passage of time, hence securing access to your servers is critical in terms of preventing important information from being compromised. By default, in Linux, we need a password or a key-pair authentication to log in to the server via SSH. However, there is another option that exists to further harden log in methods. A time-based one-time password allows you to enable two-factor authentication with single-use passwords that change every 30 seconds.
The time-based generated password will change every 30-60 seconds. This means that if an attacker tries to use brute force, they’ll almost certainly run out of time before new credentials are needed to gain access.
A one-time password will be valid for a single authentication only, thus minimizing the risk of a replay attack. Even if your TOTP is intercepted upon sending it to the server, it will no longer be valid after you’ve logged in.
By implementing two-factor authentication with a regular password, public-key (or even both), you can add an additional layer of security to protect your servers from internal or external threats.
Prerequisites
This guide assumes that you have a working installation of Ubuntu 18, 19 or 20.04 and/or Debian 9, 10 with SSH installed and running.
You will also need a smartphone or a client device with an authenticator application such as Google Authenticator, Microsoft authenticator or Authy. Several other apps exists, and steps covered in this guide should be compatible with nearly all of them.
When you have these prerequisites in place, please proceed with the following steps.
Install Google Authenticator
We will install the Google Authenticator to set up two-factor authentication. This will generate keys on your server, which will then be paired with an app on a client device (often a smartphone) to generate single-use passwords that expire after a set period of time.
Log in to your Ubuntu or Debian with a non-root-user having sudo privileges and install google-authenticator package like below:
Now that the required packages have been installed, we’ll use them to generate keys, so be sure to have your smartphone or client device ready with any of these authenticator apps installed.
We'll use a google authenticator app on a smartphone for this guide. If you haven’t downloaded an authenticator app on your smartphone or a client device, do so before proceeding with the below.
Generate a Key
The following instructions will allow you to specify a user for whom you’d like to generate a password. If you are configuring two-factor authentication for multiple users, follow these steps for each user.Type below to execute the google-authenticator program on your terminal:
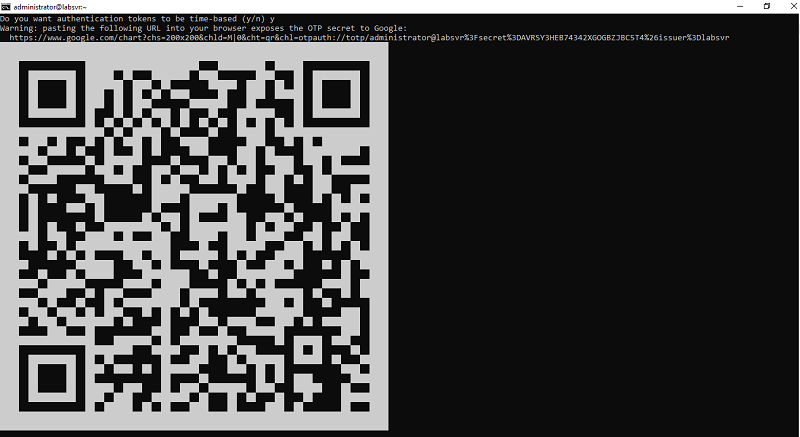
The following prompt will appear asking you to specify whether you’d like to use time-based authentication (as opposed to one-time or counter-based). Choose “yes” by entering y at the prompt.
You should see a QR code in your terminal like below:

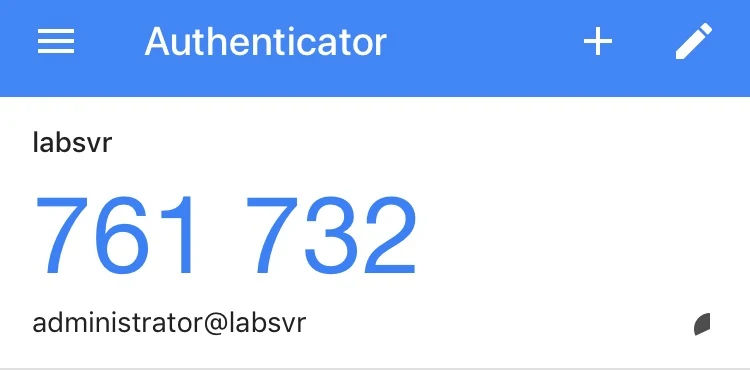
Open the authenticator app on your smartphone and scan your QR code, this automatically adds your system's user account and generates verification code every 30 seconds.

You’ll also see a “secret key” below the QR code. You can also enter this secret key into the smartphone authenticator app manually, instead of scanning the QR code, to add your account.

You’ll be prompted to answer the following questions:
This specifies whether the authentication settings will be set for this user. Answer y to create the file that stores these settings.
This makes your token a true one-time password, preventing the same password from being used twice. For example, if you set this to “no,” and your password was intercepted while you logged in, someone may be able to gain entry to your server by entering it before the time expires. We strongly recommend answering y.
This setting accounts for time syncing issues across devices. If you believe that your phone or device may not sync properly, answer y.
This setting prevents attackers from using brute force to guess your token. Although the time limit should be enough to prevent most attacks, this will ensure that an attacker only has three chances per 30 seconds to guess your password. We recommend answering y.
You have finished generating your key and adding it to your client, but some additional configuration is needed before these settings will go into effect. Carefully read the following section in this guide for instructions on how to require two-factor authentication for all SSH login attempts.
Configure Authentication Settings
You must go through this section carefully to avoid getting locked out of your server. We recommend opening another terminal session for reverting back the settings if you misconfigure anything.Edit /etc/pam.d/sshd with any of your preferred editor:
Add the following lines to the end of the file:
Save and close the editor.
Next, edit /etc/ssh/sshd_config file:
Comment out the following line by adding # at the beginning like below:
Uncomment the following line by removing #
then, add these lines to the end of the file
Save and close the editor.
Make sure you replace administrator with your system user for which you’d like to enable two-factor authentication.
If you want to enforce two-factor authentication for all users instead of a single user, you can use the AuthenticationMethods directive by itself, outside of a Match User block. However, this should not be done until two-factor credentials have been provided to all users.
Restart the SSH to apply these changes:
Two-factor authentication is now enabled. When you connect to your server via SSH, the authentication process will take place.
Test Two-factor Authentication
You can test your two-factor configuration by connecting to your server via SSH. You will be prompted to enter your standard user account’s password and then, you will be prompted to enter a Verification Code as shown in the image below.


You should authenticate successfully and gain access to your server.

If your SSH client disconnects before you can enter your two-factor token, check if PAM is enabled for SSH. You can do this by editing /etc/ssh/sshd_config: look for UsePAM and set it to yes, then restart the SSH to apply changes.
Combine Two-factor and Public Key Authentication
If you’d like to use public-key authentication instead of a password alongside TOTP, follow these steps to set it up.We assume that you have already set up ssh key-pair
Edit /etc/ssh/sshd_config to include public key:
Set PasswordAuthentication to no and modify the AuthenticationMethods line like below:
Save and close the editor.
Configure this setting in the AuthenticationMethods directive for each user as appropriate. When any of these users log in, they will need to provide their SSH key and they will be authenticated via TOTP, as well.
Restart your SSH to apply these changes.
Next, you’ll need to make changes to your PAM configuration.
Comment out the following lines by inserting # at the beginning like below:
You should now be able to log in using your SSH key as the first method of authentication and your verification code as the second. To test your configuration, log out and try to log in again via SSH. You should be asked for your 6-digit verification code only since the key authentication will not produce a prompt.
Wrapping up
Now that you enabled two-factor authentication for SSH on your Ubuntu or Debian, you may wish to consult the Linux PAM Documentation following resources for additional information on this topic.

No comments: