This guide will walk you through the steps to install and configure the most latest release of cacti on a CentOS/RHEL 8. These steps can also be applied if you are running CentOS or RHEL 7.
Note: With CentOS 8 release, yum command has been replaced with dnf and in near future yum package manager will be discontinued. It is now recommended to use dnf for installing packages but if you still wish to use yum you can use it.
vi /etc/selinux/config
SELINUX=disabled
Save and close.
reboot
dnf -y install epel-release
dnf -y install httpd httpd-devel
dnf -y install mysql-server mysql
dnf -y install php php-json php-gmp php-intl php-mysqlnd php-pear php-common php-gd php-devel php-mbstring php-cli php-snmp php-ldap net-snmp net-snmp-utils net-snmp-libs tar wget nano
dnf -y install rrdtool
systemctl start httpd
systemctl start mysqld
systemctl start snmpd
systemctl start httpd
systemctl enable mysqld
systemctl enable snmpd
wget https://download-ib01.fedoraproject.org/pub/epel/testing/7/x86_64/Packages/c/cacti-1.2.8-1.el7.noarch.rpm
dnf -y install cacti-1.2.8-1.el7.noarch.rpm
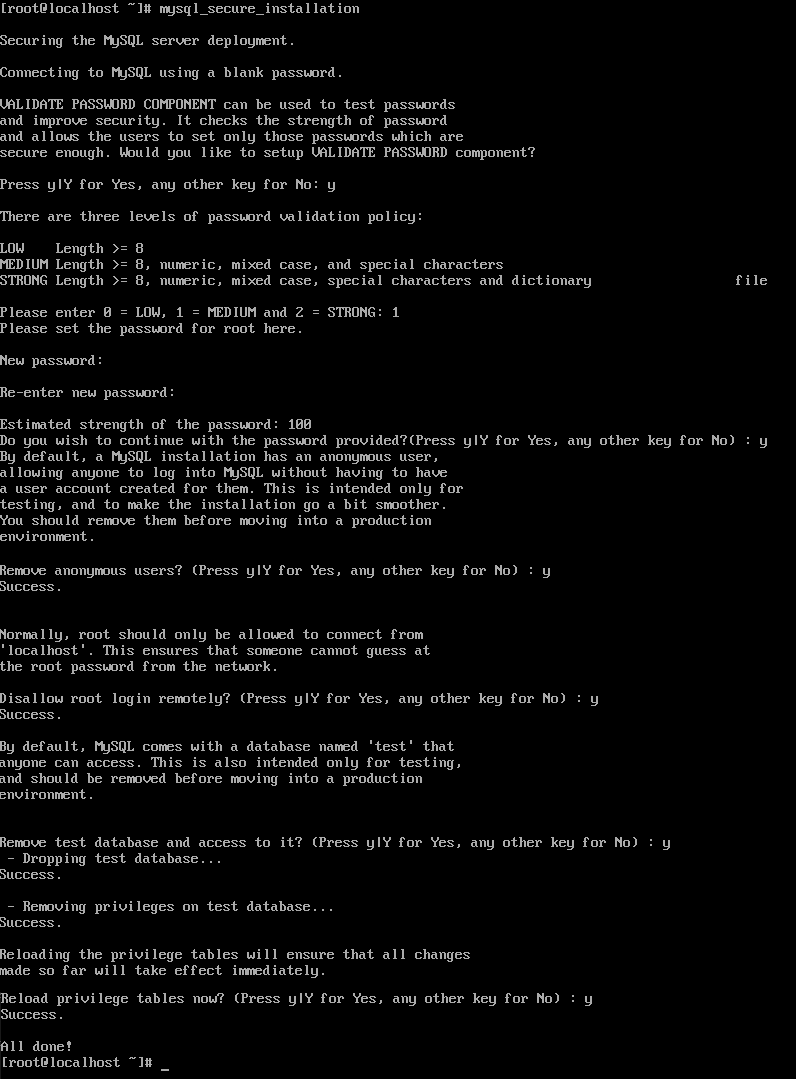
mysql_secure_installation
You need to access mysql prompt to create a user and a database for cacti. Please replace following highlighted text to reflect yours:
mysql -u root -p
create database cacti;
CREATE USER 'cacti'@'localhost' IDENTIFIED BY 'YourPassword';
GRANT ALL ON cacti.* TO 'cacti'@'localhost';
FLUSH privileges;
set global log_bin_trust_function_creators=1;
quit;
You need to search cacti.sql file and then import it into newly created database using the following command:
find / -name cacti.sql
Output:
/usr/share/doc/cacti-1.2.8/cacti.sql
Now importing into cacti database:
mysql -u cacti -p cacti < /usr/share/doc/cacti-1.2.8/cacti.sql
vi /etc/cacti/db.php
$database_type = "mysql";
$database_default = "cacti";
$database_hostname = "localhost";
$database_username = "cacti";
$database_password = "YourPasswordHere";
$database_port = "3306";
$database_ssl = false;
Save and close.
Connect to mysql prompt again and grant the timezone settings for user cacti like below:
mysql -u root -p
use mysql;
grant select on mysql.time_zone_name to cacti@localhost;
flush privileges;
quit;
mysql_tzinfo_to_sql /usr/share/zoneinfo/ | mysql -u root -p mysql
You can safely ignore if warning like these occurred:
Warning: Unable to load '/usr/share/zoneinfo//iso3166.tab' as time zone. Skipping it.
Warning: Unable to load '/usr/share/zoneinfo//leapseconds' as time zone. Skipping it.
Warning: Unable to load '/usr/share/zoneinfo//tzdata.zi' as time zone. Skipping it.
Warning: Unable to load '/usr/share/zoneinfo//zone.tab' as time zone. Skipping it.
Warning: Unable to load '/usr/share/zoneinfo//zone1970.tab' as time zone. Skipping it.
Update firewall rules using the following command:
firewall-cmd --permanent --zone=public --add-service=http
firewall-cmd --reload
vi /etc/httpd/conf.d/cacti.conf
<Directory /usr/share/cacti/>
<IfModule mod_authz_core.c>
# httpd 2.4
# Require host localhost
Require all granted
</IfModule>
<IfModule !mod_authz_core.c>
# httpd 2.2
Order deny,allow
Deny from all
Allow from 192.168.105.0/24
</IfModule>
</Directory>
Save and close.
Restart Apache service to take changes into effect:
systemctl restart httpd
vi /etc/php.ini
date.timezone = Asia/Karachi
memory_limit = 400M
max_execution_time = 60
Save and close.
vi /etc/my.cnf
[mysqld]
collation_server = utf8mb4_unicode_ci
max_heap_table_size = 29M
tmp_table_size = 29M
join_buffer_size = 60M
innodb_buffer_pool_size = 1024M
innodb_flush_log_at_timeout = 3
innodb_read_io_threads = 32
innodb_write_io_threads = 16
innodb_buffer_pool_instances = 11
innodb_io_capacity = 5000
innodb_io_capacity_max = 10000
Save and close.
Access the mysql prompt and alter the cacti database like below:
mysql -u root -p
ALTER DATABASE cacti CHARACTER SET utf8mb4 COLLATE utf8mb4_unicode_ci;
quit;
Now restart MySQL service to take changes into effect:
systemctl restart mysqld
Run the following command to update appropriate permission for logs:
chown -R root.root /usr/share/cacti/log/
Now reboot your machine to take all the changes into effect:
reboot
vi /etc/cron.d/cacti
*/5 * * * * cacti /usr/bin/php /usr/share/cacti/poller.php > /dev/null 2>&1
Save and close.
Enter the default username admin and password admin to log in.
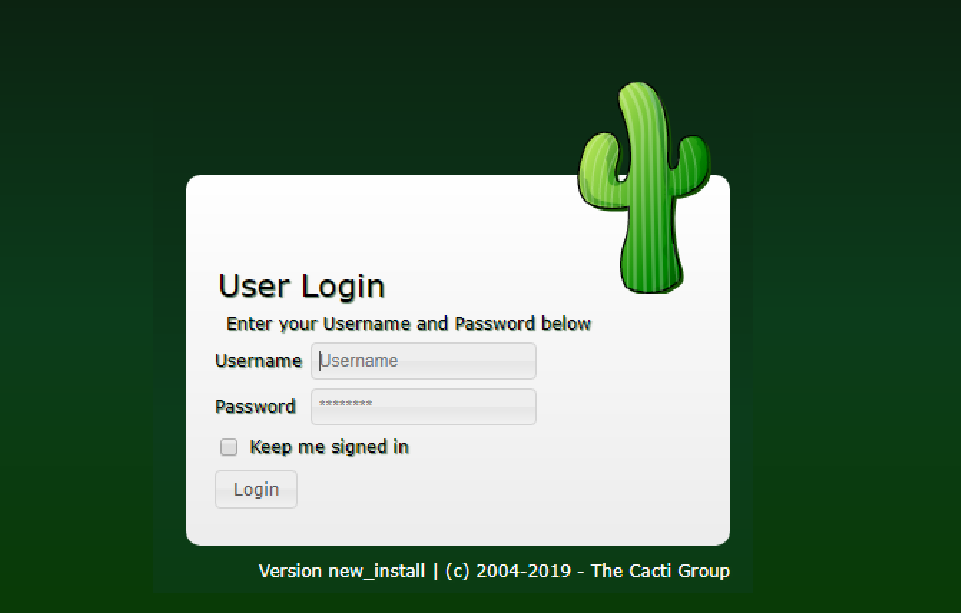
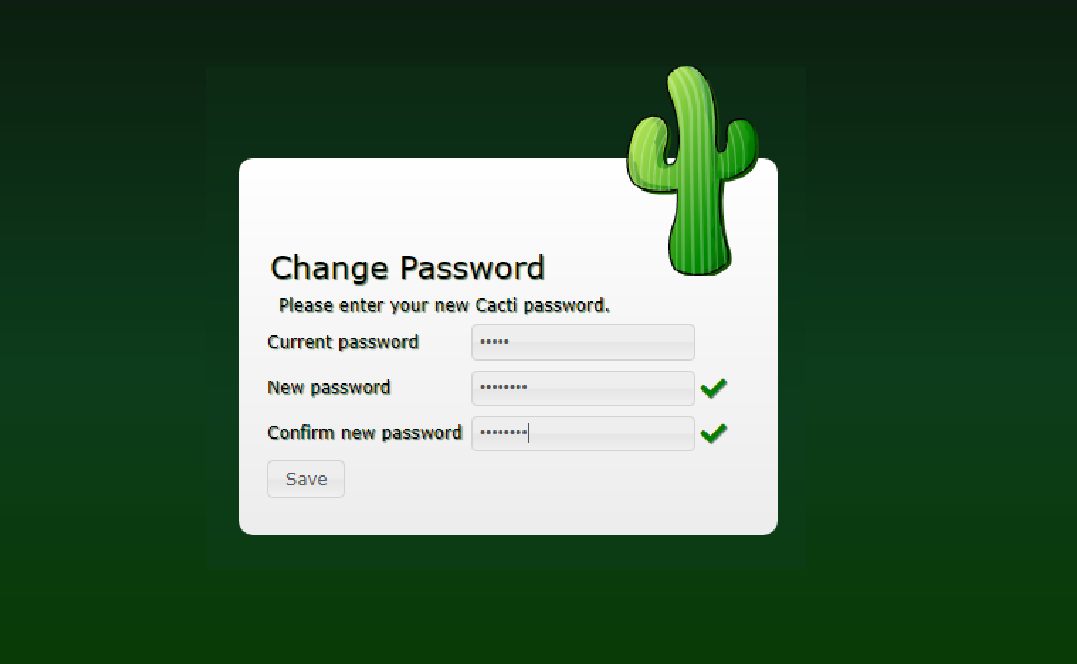
Next, you will be prompted to change default Cacti password.
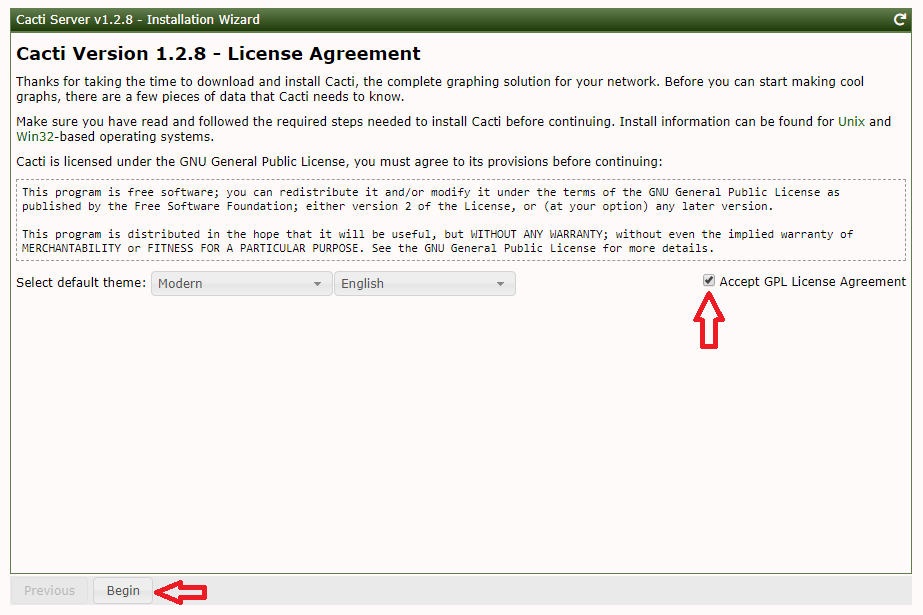
Accept Cacti License Agreement.
Choose the installation Type as “New Primary Server“.

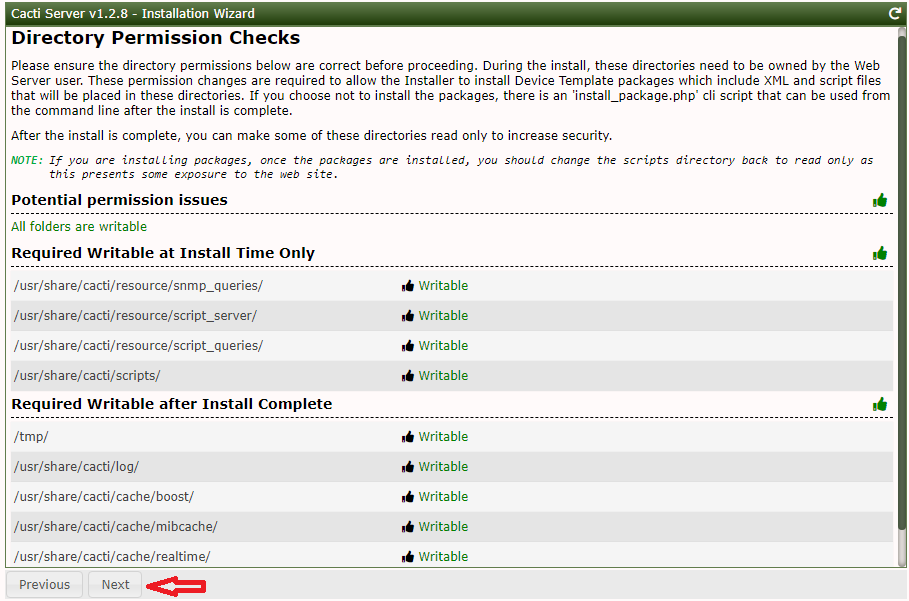
Make sure all the directory permissions are correct like below before proceeding next.
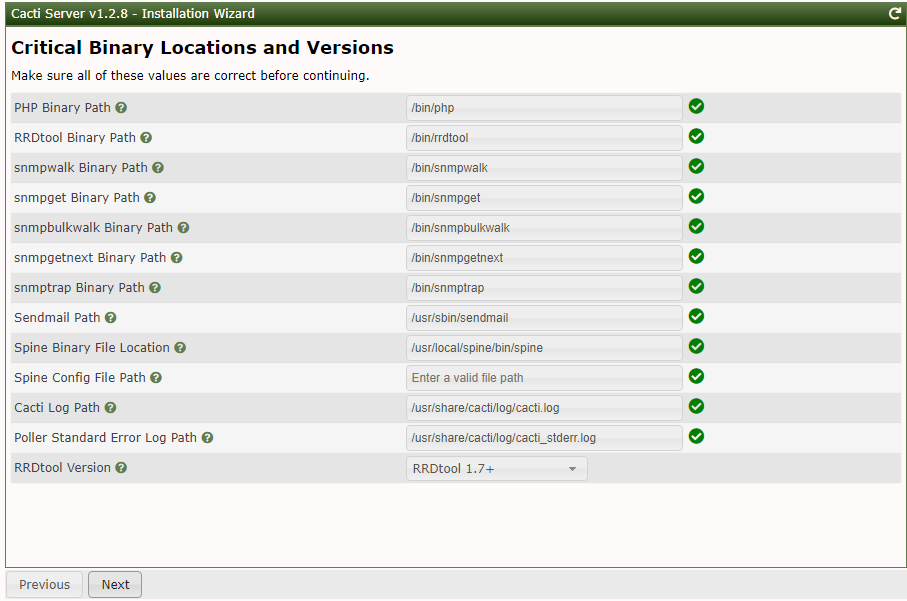
Make sure all of these Critical Binary Locations and Versions values are correct like below before proceeding next
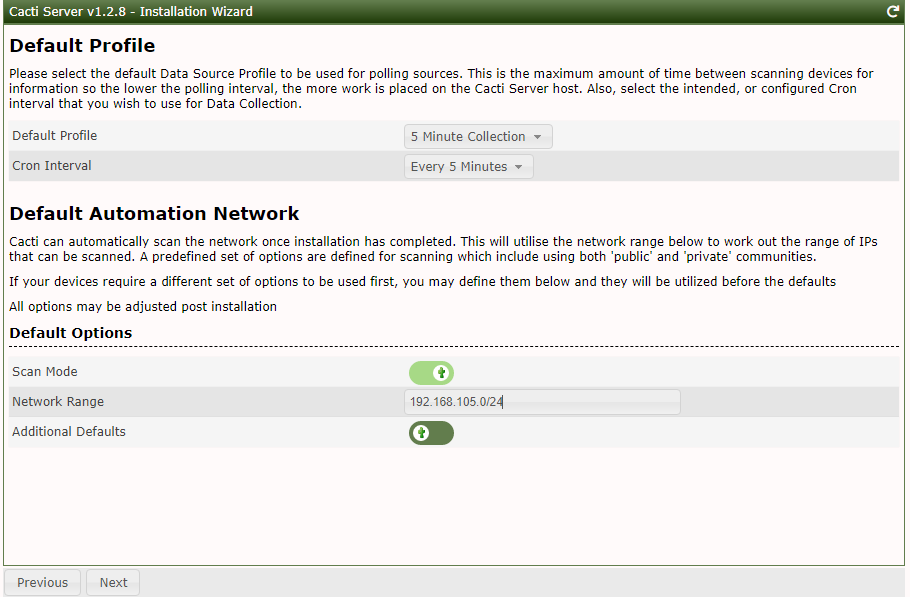
Please keep the Default Profile and Cron Interval to be used for polling sources and update the network range according to yours:
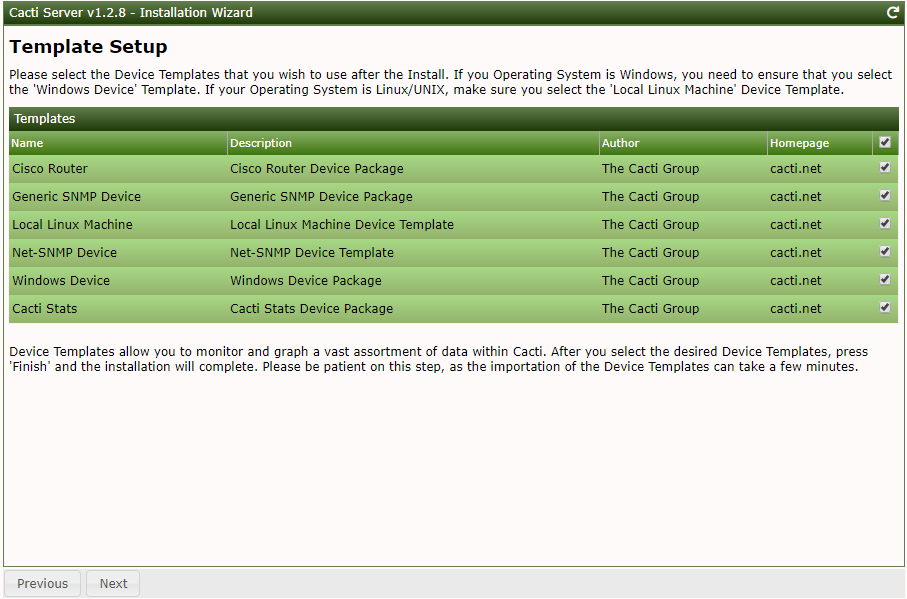
We are taking all templates into account. You can select the Device Templates that you wish to use after the Cacti Install.
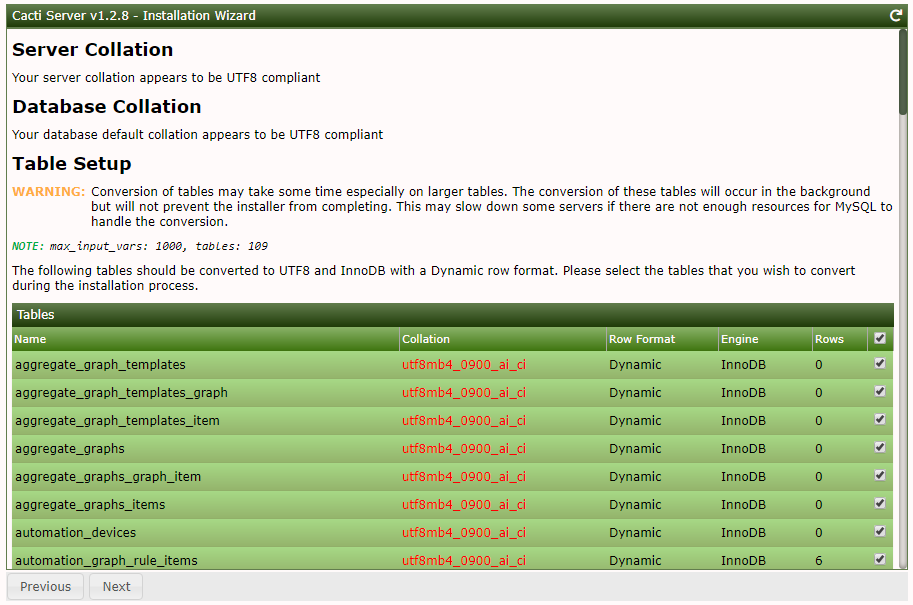
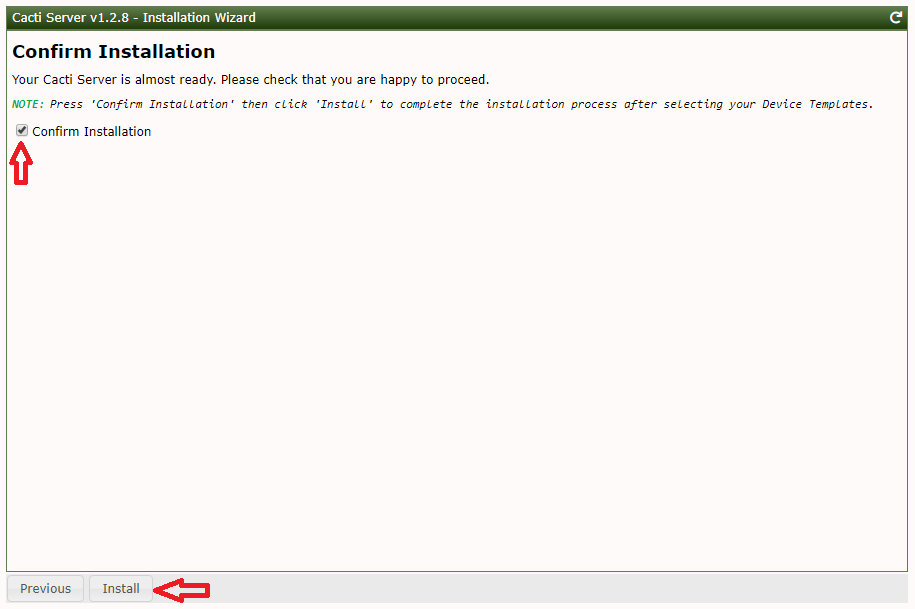
Tick Confirm Installation and then click Install.
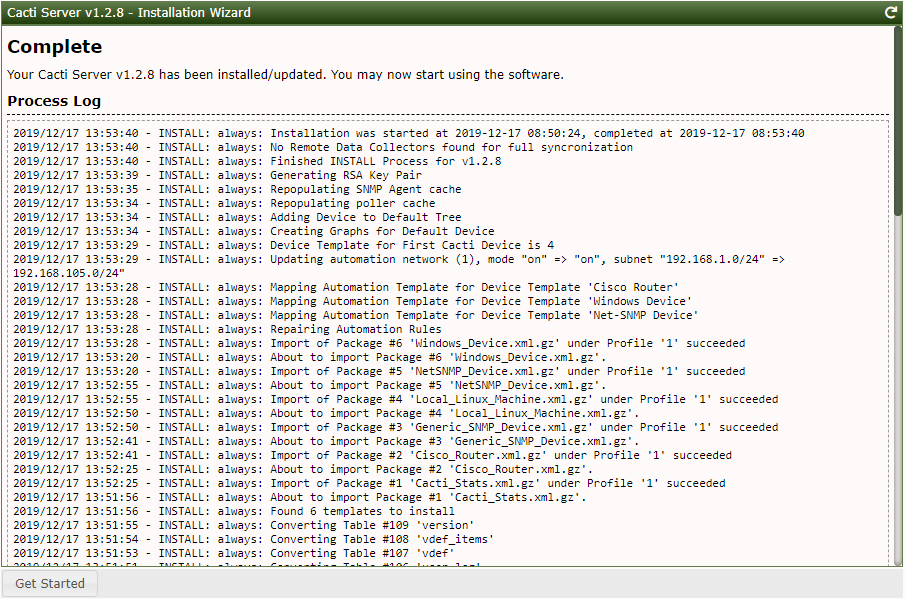
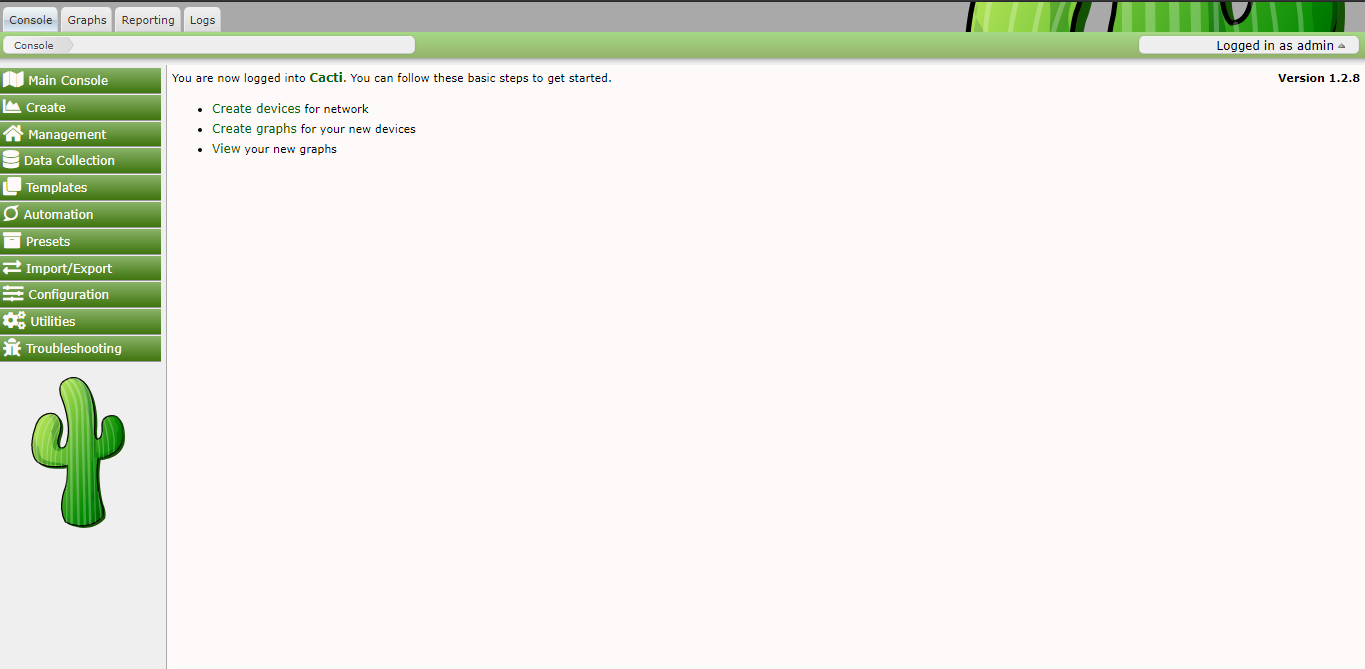
Once the installation process complete, click Get Started
And from this screen you can start adding your network devices in cacti.
Note: With CentOS 8 release, yum command has been replaced with dnf and in near future yum package manager will be discontinued. It is now recommended to use dnf for installing packages but if you still wish to use yum you can use it.
Prerequisites:
You will need one CentOS 7/8 or RHEL 7/8 (physical or virtual machine) with minimal installed having root user privileges.Disabling SELinux
Log into your CentOS 7/8 server and change SELINUX=enforcing to SELINUX=disabled for smooth deployment of cacti.vi /etc/selinux/config
SELINUX=disabled
Save and close.
reboot
Installing EPEL Repository
It is recommended to install latest (extra packages for enterprise Linux) repository:dnf -y install epel-release
Installing Apache
You can install Apache web server using the following command:dnf -y install httpd httpd-devel
Installing MYSQL
You can install mysql database using the following command:dnf -y install mysql-server mysql
Installing PHP
You can install PHP required dependencies for cacti using the following command:dnf -y install php php-json php-gmp php-intl php-mysqlnd php-pear php-common php-gd php-devel php-mbstring php-cli php-snmp php-ldap net-snmp net-snmp-utils net-snmp-libs tar wget nano
Installing RRDTOOL
RRDtool is the OpenSource industry standard, high performance data logging and graphing system for cacti.dnf -y install rrdtool
Starting Services
Now we need to start following services and make them persistent even when the system reboot:systemctl start httpd
systemctl start mysqld
systemctl start snmpd
systemctl start httpd
systemctl enable mysqld
systemctl enable snmpd
Installing Cacti
Check out the latest release cacti on its home page and then find out if it is available in rpm format on https://pkgs.org. As of now the cacti's most latest release is 1.2.8 and and it is available in rpm format on pkgs.org.
dnf -y install cacti-1.2.8-1.el7.noarch.rpm
Configuring Database
First you will need to secure your MySQL database installation by running the following script:mysql_secure_installation

You need to access mysql prompt to create a user and a database for cacti. Please replace following highlighted text to reflect yours:
mysql -u root -p
create database cacti;
CREATE USER 'cacti'@'localhost' IDENTIFIED BY 'YourPassword';
GRANT ALL ON cacti.* TO 'cacti'@'localhost';
FLUSH privileges;
set global log_bin_trust_function_creators=1;
quit;
You need to search cacti.sql file and then import it into newly created database using the following command:
find / -name cacti.sql
Output:
/usr/share/doc/cacti-1.2.8/cacti.sql
Now importing into cacti database:
mysql -u cacti -p cacti < /usr/share/doc/cacti-1.2.8/cacti.sql
Database Settings
Update the database credentials in /etc/cacti/db.php file like below:vi /etc/cacti/db.php
$database_type = "mysql";
$database_default = "cacti";
$database_hostname = "localhost";
$database_username = "cacti";
$database_password = "YourPasswordHere";
$database_port = "3306";
$database_ssl = false;
Save and close.
Connect to mysql prompt again and grant the timezone settings for user cacti like below:
mysql -u root -p
use mysql;
grant select on mysql.time_zone_name to cacti@localhost;
flush privileges;
quit;
mysql_tzinfo_to_sql /usr/share/zoneinfo/ | mysql -u root -p mysql
You can safely ignore if warning like these occurred:
Warning: Unable to load '/usr/share/zoneinfo//iso3166.tab' as time zone. Skipping it.
Warning: Unable to load '/usr/share/zoneinfo//leapseconds' as time zone. Skipping it.
Warning: Unable to load '/usr/share/zoneinfo//tzdata.zi' as time zone. Skipping it.
Warning: Unable to load '/usr/share/zoneinfo//zone.tab' as time zone. Skipping it.
Warning: Unable to load '/usr/share/zoneinfo//zone1970.tab' as time zone. Skipping it.
Update firewall rules using the following command:
firewall-cmd --permanent --zone=public --add-service=http
firewall-cmd --reload
Configuring Apache
Now you need to update or replace the following highlighted parameters in cacti.conf file to reflect yours:vi /etc/httpd/conf.d/cacti.conf
<Directory /usr/share/cacti/>
<IfModule mod_authz_core.c>
# httpd 2.4
# Require host localhost
Require all granted
</IfModule>
<IfModule !mod_authz_core.c>
# httpd 2.2
Order deny,allow
Deny from all
Allow from 192.168.105.0/24
</IfModule>
</Directory>
Save and close.
Restart Apache service to take changes into effect:
systemctl restart httpd
Configuring PHP
You need to update or replace the following parameters in /etc/php.ini file to reflect yours:vi /etc/php.ini
date.timezone = Asia/Karachi
memory_limit = 400M
max_execution_time = 60
Save and close.
You will also need to add the following parameters in /etc/my.cnf file to fulfill the cacti's requirement for database. These parameters values may vary so pay attention and set accordingly.
[mysqld]
collation_server = utf8mb4_unicode_ci
max_heap_table_size = 29M
tmp_table_size = 29M
join_buffer_size = 60M
innodb_buffer_pool_size = 1024M
innodb_flush_log_at_timeout = 3
innodb_read_io_threads = 32
innodb_write_io_threads = 16
innodb_buffer_pool_instances = 11
innodb_io_capacity = 5000
innodb_io_capacity_max = 10000
Save and close.
Access the mysql prompt and alter the cacti database like below:
mysql -u root -p
ALTER DATABASE cacti CHARACTER SET utf8mb4 COLLATE utf8mb4_unicode_ci;
quit;
Now restart MySQL service to take changes into effect:
systemctl restart mysqld
Run the following command to update appropriate permission for logs:
chown -R root.root /usr/share/cacti/log/
Now reboot your machine to take all the changes into effect:
reboot
Activating Cron
Once rebooted, edit /etc/cron.d/cacti file and uncomment the following line by removing #:vi /etc/cron.d/cacti
*/5 * * * * cacti /usr/bin/php /usr/share/cacti/poller.php > /dev/null 2>&1
Save and close.
Cacti's Web Installer
At this stage, navigate to http://Your_CentOS_IP/cacti/ and follow the installer instruction to proceed like below:Enter the default username admin and password admin to log in.

Next, you will be prompted to change default Cacti password.

Accept Cacti License Agreement.

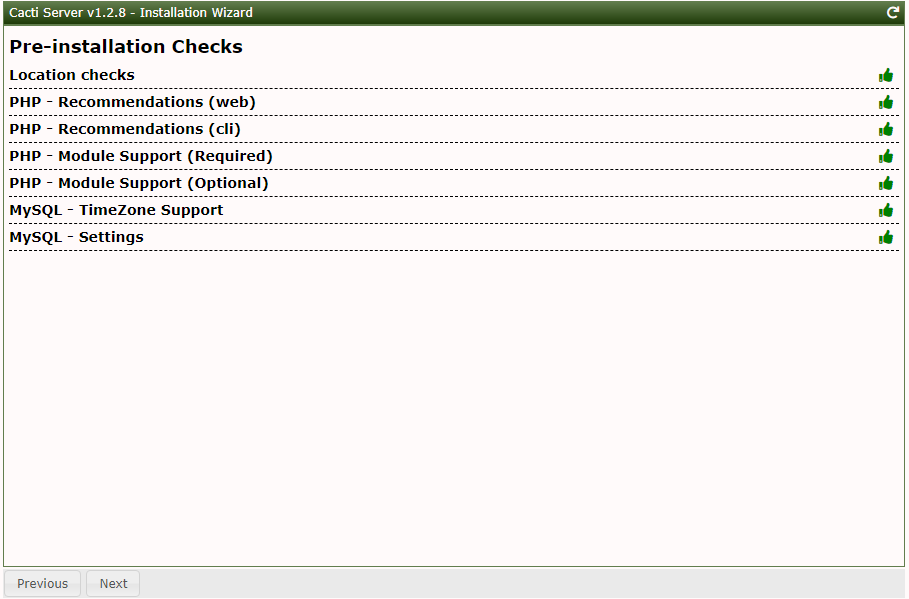
This screen performs Pre-installation Checks for Cacti, please correct if any suggested settings appears in your /etc/php.ini file and restart Apache service to take changes into effect. We have already met the requirement so in our case all well.

Choose the installation Type as “New Primary Server“.

Make sure all the directory permissions are correct like below before proceeding next.

Make sure all of these Critical Binary Locations and Versions values are correct like below before proceeding next

Please keep the Default Profile and Cron Interval to be used for polling sources and update the network range according to yours:

We are taking all templates into account. You can select the Device Templates that you wish to use after the Cacti Install.

If anything suggested on this screen to be updated then update it in your MySQL configuration file /etc/my.cnf under the [mysqld] section. In our case we have already met the requirement so click Next to proceed.

Tick Confirm Installation and then click Install.

Once the installation process complete, click Get Started

And from this screen you can start adding your network devices in cacti.

Wrapping up
You have successfully installed the most latest release of cacti on a CentOS 8 server.

No comments: