
The
objective of this guide is to install Nvidia driver, and enable Nvidia GPU in hybrid graphics
laptop all the time and use it for each and every single activity. Please do not
perform these steps if you want to render your desktop using the integrated GPU and specifically select applications to be rendered using the Nvidia GPU.
Pros
- The use of Nvidia GPU all the time would allow for smoother transitions and richer animation effects. Premium desktop environments like GNOME would benefit a lot from this.
- Enabling the Nvidia GPU all the time would lead to lower CPU load and memory consumption which otherwise would have been high due to added in-memory video buffer.
Cons
- With the Nvidia GPU used all the time, there would be a slight increase in battery consumption which should not be a concern if your device is used while being plugged in.
- Increased generation of heat from the all-the-time enabled Nvidia GPU can be worrisome. You would not want to play AAA-titles on Proton while placing your laptop on your lap.
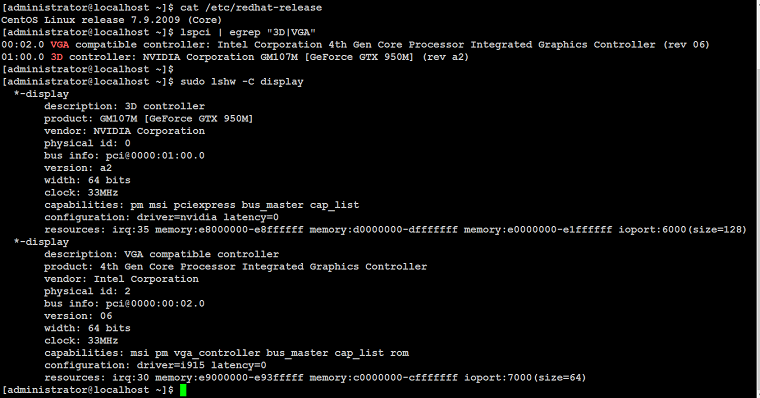
For the sake of this guide, we have a laptop with dual graphics adapter installed, one is intel integrated GPU and other is Nvidia GTX 950M, and we have installed CentOS Linux on top of it, as you can see in screenshot below:
This guide requires "Secure Boot" to be turned off from BIOS of your system (if exist) or Nvidia driver loading will fail.
Add RPMFusion Repository
First, you need to add the RPMFusion repository in your system to make the Nvidia driver packages available. To enable access to these repository, execute the following command, depending on what distribution you use and then follow the default options to install.
For CentOS, RHEL 7:For CentOS, RHEL 8:RHEL 8 requires an additional step:
CentOS Steam 8 requires an additional step:
CentOS 8 (older version) used a case sensitive name for the PowerTools repository:
CentOS Steam 8 requires an additional step:
CentOS 8 (older version) used a case sensitive name for the PowerTools repository:
Install NVIDIA Driver
Type below command to install latest available Nvidia driver on CentOS, RHEL 7For CentOS, RHEL 8:You must wait 5-10 minutes for the kernel modules to load. Please do not proceed to the next steps immediately.Execute following command to force the configuration to be read from the updated kernel modules which now have the latest Nvidia driver in them.Wait for 3-5 minutes for the changes to take effect and then reboot your system.
Once your system has started, you need to locate Nvidia driver configuration file that contain display render details for the X11. Most likely, the file name would be nvidia.conf, or nvidiasomething.conf should exist under /usr/share/X11/xorg.conf.d/ directory.
Copy /usr/share/X11/xorg.conf.d/nvidia.conf file to /etc/X11/xorg.conf.d/ with below command:Reboot your system to activate changes.At this stage, your Nvidia driver installation is now successfully completed. How to make NVIDIA GPU Primary
To make sure which GPU is currently acting as primary, open up Settings application, navigate to Details > About screen:
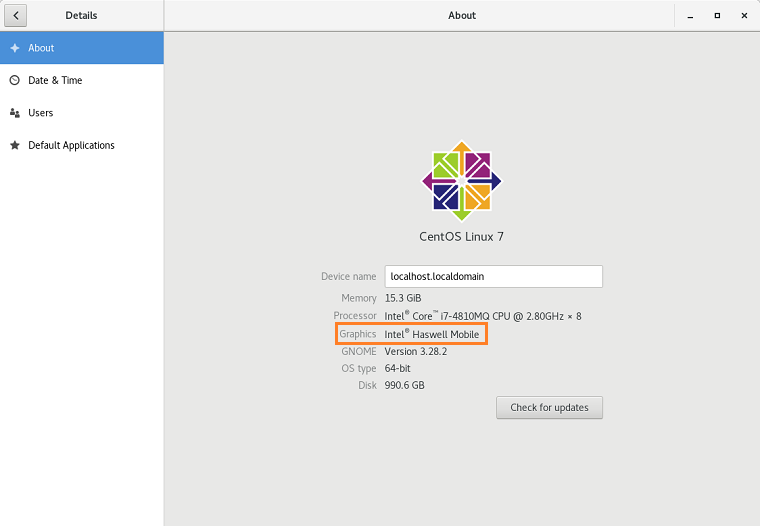
As you can see, the primary GPU in our case is intel integrated. To make Nvidia GPU primary, you need to edit nvidia.conf file like below:
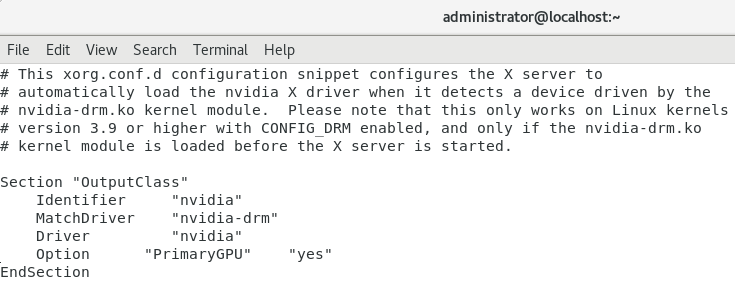
add Option "PrimaryGPU" "yes" to every Section of it:
Save and close the editor when you are finished.
Your nvidia.conf file after modification, will look similar to like below:
Reboot your system to make the changes to take effect.
Verify Nvidia Configuration
Once your system has started, go to the About page in the Settings application. You are likely to see the following output.

As you can see, Nvidia is now primary GPU, and it will be used for each and every single activity all the time.
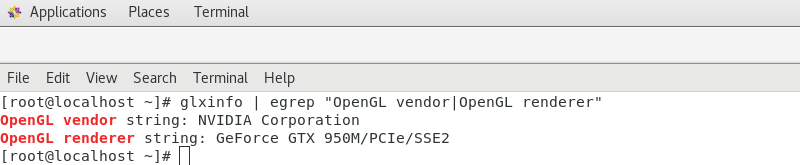
Execute below command to test your Nvidia rendering:
It should show your Nvidia GPU like below.
Type below command to clone famous screenfetch script from github:
Execute screenfetch:
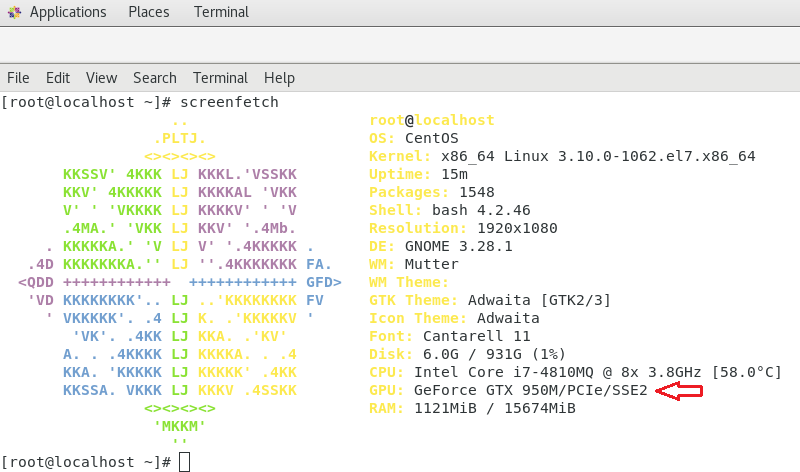
It should show your Nvidia GPU under the GPU name like below:
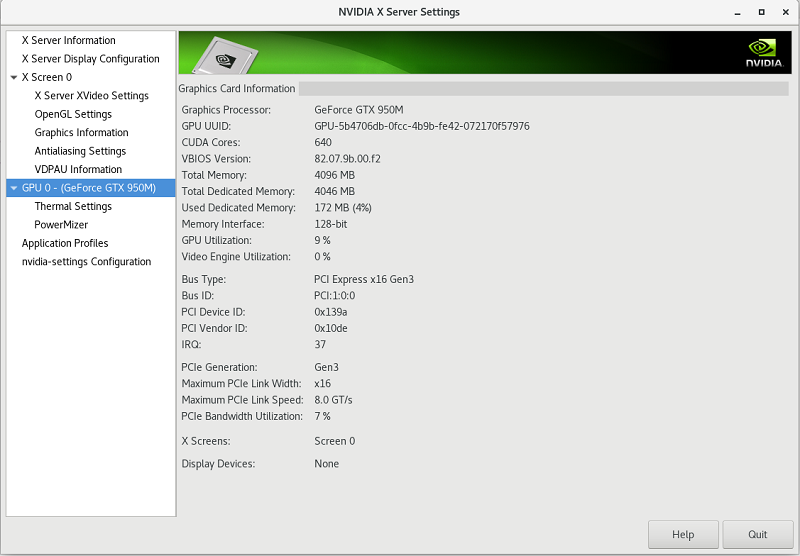
Execute below command to open NVIDIA X Server Settings application:
You can make other configuration changes using NVIDIA X Server Settings application. Also the GPU would show activity in its utilization percentage to signify that it is actually working.
Wrapping up
In this guide you learn, how to install Nvidia driver on a dual graphics or hybrid graphics laptop running CentOS, RHEL or Oracle Linux on top of it. You also learn how to make your Nvidia GPU primary for each and every activity all the time.
No comments: