This tutorial will show you how to set up WordPress with OpenLiteSpeed web server on CentOS or RHEL 8.
Note: With CentOS 8 release, yum command has been replaced with dnf and in near future yum package manager will be discontinued. It is now recommended to use dnf for installing packages but if you still wish to use yum you can use it.
Prerequisites
You will need one CentOS or RHEL 8 (physical or virtual) machine with minimal installed having sudo non-root user privileges.Disabling SELinux
You should change from SELINUX=enforcing to SELINUX=disabled in /etc/selinux/config file for smooth installation:Save and close file when you are finished.
Now reboot your machine to take changes into effect:
Adding EPEL Repository
It is always recommended to install extra packages for enterprise Linux repository before proceeding to install packages using yum package manager:Installing Dependencies
You will need to install following required dependencies prior to install openlitespeed web server:Installing OpenLiteSpeed
OpenLiteSpeed provides a repository for its software you can use to download and install the server with CentOS’s standard yum command.Setting the Administrative Password
By default, the password is set to 123456, so you should change this immediately. You can do this by running a script provided by OpenLiteSpeed: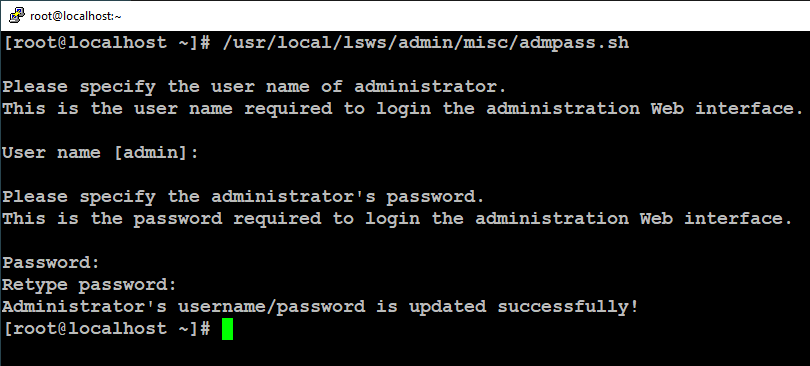
Verifying Server Status
OpenLiteSpeed should have started automatically after it was installed. You can verify this using the lswsctrl command:If it is not started, you can start the server using lswsctrl:
Adding Firewall Rules
Now you need to allow these ports from firewall to access OpenLiteSpeed web interface.Installing MySQL
You can install MySQL database using the following command:Securing MySQL
After fresh installation of MySQL database, you will need to run the following mysql_secure_installation script and follow the instruction to make it secure:Creating Database for WordPress
WordPress uses MySQL to manage and store site and user information. We already have MySQL installed, but we need to create a database and a user for WordPress to use.Log in to the root MySQL account like below
Then enter your root user’s password when prompted.
At this point, we will create and name this database and user wordpress to keep things simple and easy to remember, but you can name it whatever you’d like.
From the MySQL prompt, create a database and a user with the following commands:
You’re done setting up your MySQL installation to work with WordPress.
Installing Required PHP Extensions
To install these required PHP extensions commonly used with WordPress, execute the following command:Downloading WordPress
For security reasons, it is recommended that you download the latest version of WordPress directly from their website.Change into user home directory and then download the latest release by typing:
Now add a dummy .htaccess file so that it will be available for WordPress to use later:
Next, copy over the sample configuration file to the filename that WordPress actually reads:
Also, create the upgrade directory so that WordPress won’t run into permissions issues when trying to do this on its own following an update to its software:
Then, copy the entire contents of the directory into your document root. OpenLiteSpeed comes with a default virtual host named Example located in the /usr/local/lsws/ directory. The document root for the Example virtual host is the html sub-directory:
Notice that this command includes a dot at the end of the source directory to indicate that everything within the directory should be copied, including hidden files (like the .htaccess file you created):
You’ve successfully installed WordPress onto your web server and performed some of the initial configuration steps.
Configuring WordPress
Before you begin with the web-based setup process for WordPress, you need to adjust some items in your WordPress directory.The following commands will grant OpenLiteSpeed the ability to read and write files in the wordpress directory, allowing it to serve the website and perform automatic updates:
Now you will need to make some changes to the main WordPress configuration file.
You will get back unique values that look something like this:

These are configuration lines that you will paste directly into your configuration file to set secure keys. Copy the output you received to your clipboard, and then open the WordPress configuration file located in your document root:
Find the section that contains the dummy values for those settings. It will look something like this:

Delete these lines and paste in the values you copied from the command line, the file will look like below:

Next, modify the database connection settings at the top of the file. You need to adjust the database name, database user, and the associated password that you configured within MySQL. Lastly, add the define('FS_METHOD', 'direct'); parameter:
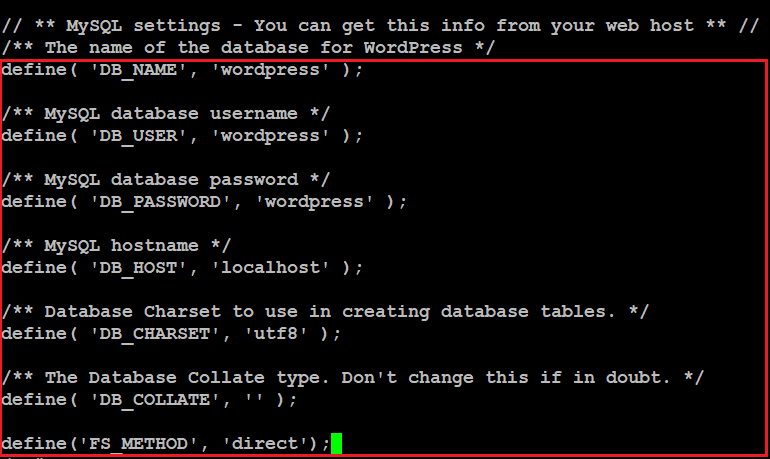
Save and close the file when you are finished.
Configuring OpenLiteSpeed
In this step, you’ll access the OpenLiteSpeed administrative interface and make a few changes to your server’s configuration.Open up your favorite web browser, navigate to the OpenLiteSpeed administrative interface:
http://server_name_or_IP:7080 and log in with the username admin and password you set up with adminpass.sh script.
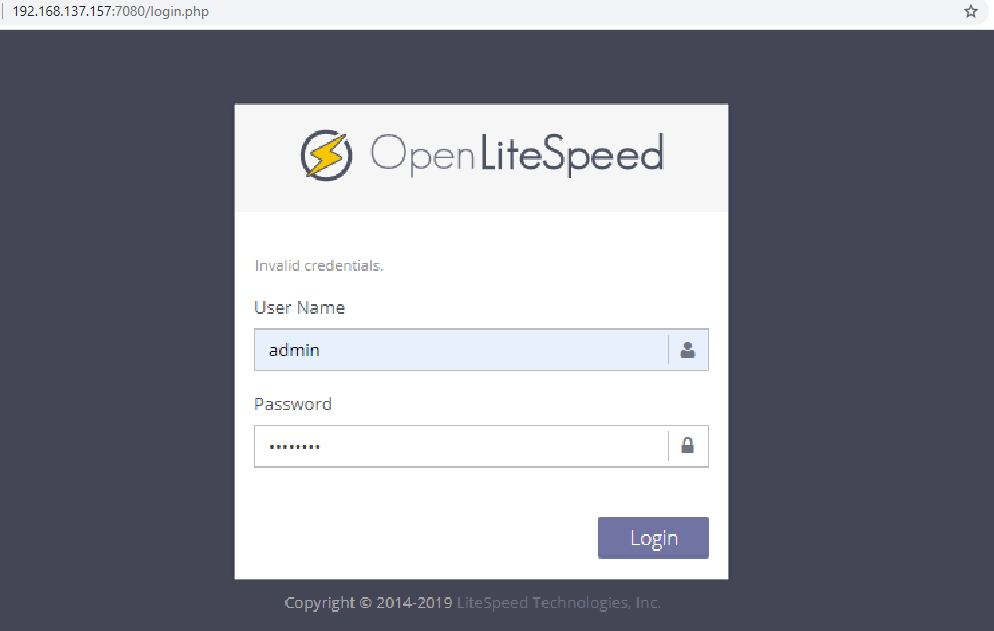
From the OpenLiteSpeed console, find and click on Server Configuration in the left-hand sidebar menu. Then navigate to the External App tab, find the row of the LiteSpeed SAPI App, and click on its Edit button:
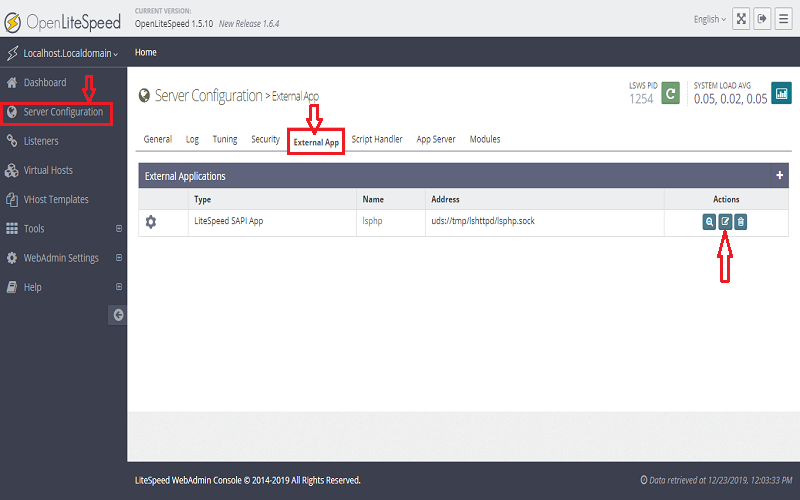
You installed the lsphp73 package, a compilation of PHP optimized to work with OpenLiteSpeed through the LiteSpeed SAPI. However, the default settings in the External App page point to lsphp rather than lsphp73. Due to this, your OpenLiteSpeed installation won’t be able to correctly execute PHP scripts.
To correct this, change the Name field to lsphp73, change the Address field to uds://tmp/lshttpd/lsphp73.sock, and change the Command field to read $SERVER_ROOT/lsphp73/bin/lsphp:
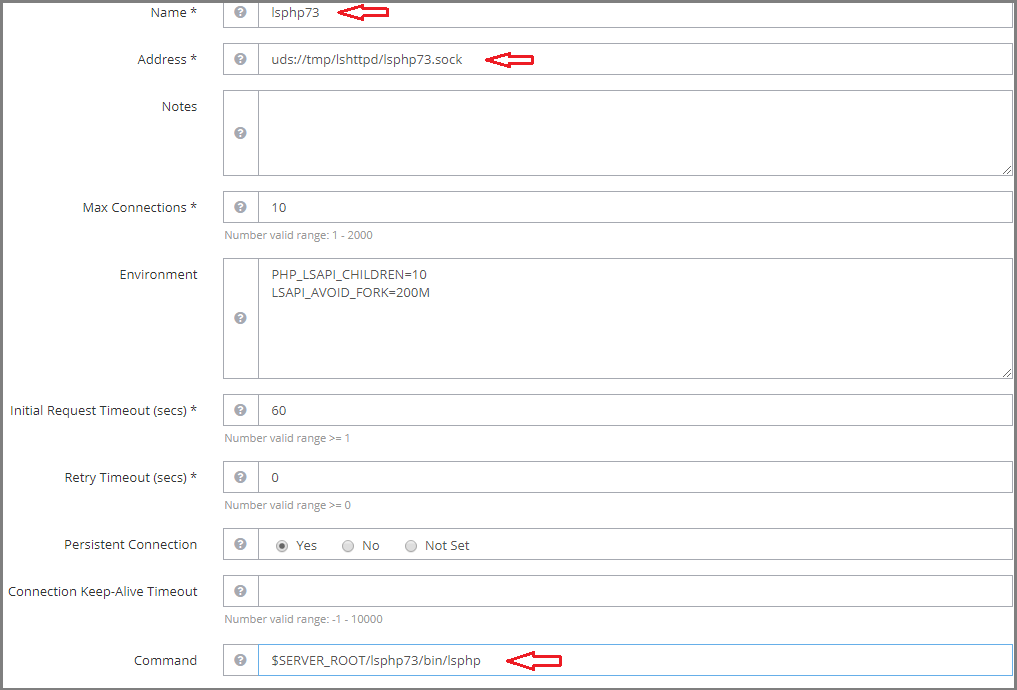
After making those changes, click on the Save icon in the upper right-hand corner of the LiteSpeed SAPI App box.
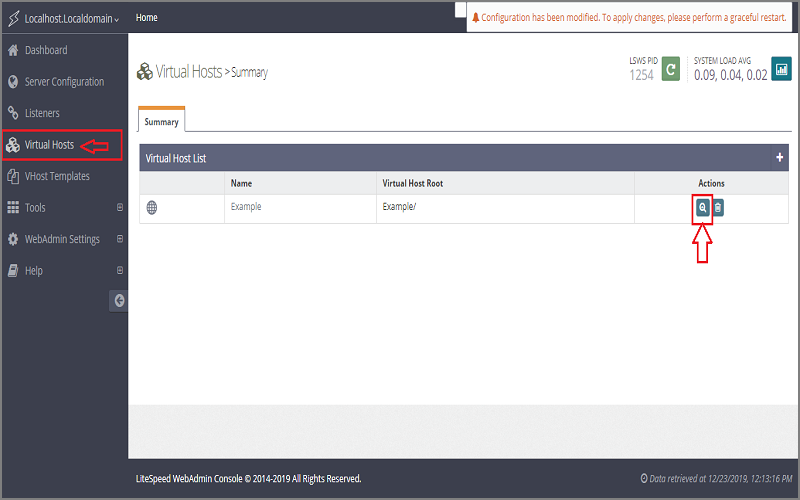
Next, click on Virtual Hosts in the left-hand menu. On the Virtual Hosts page, find the virtual host you plan to use and click on its View icon. For this guide, we’ll use the default Example virtual host:
Navigate to the virtual host’s General tab. There, find the General section, and click on its Edit button:
All of your WordPress content and files are stored in the wordpress directory you created earlier, update the Document Root field to point to that directory. To do this, all you need to do is append wordpress/ to the end of the default value:
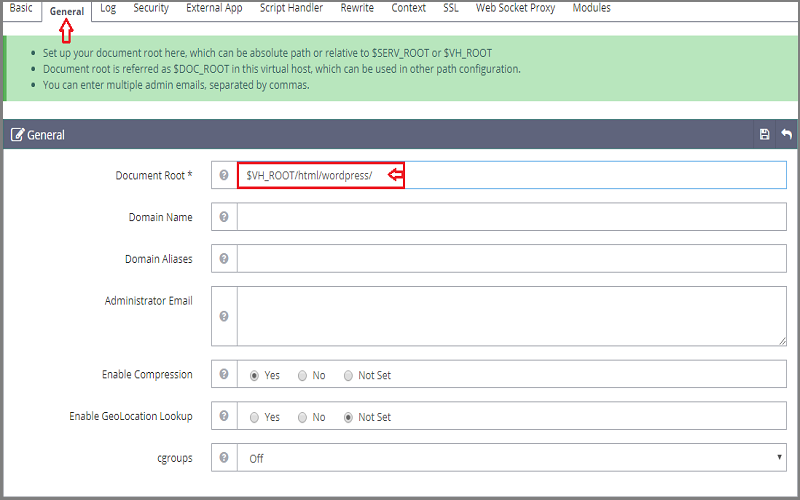
Click the Save icon to save this change.
While still in the General tab, scroll down to find the Index Files section and click on its Edit icon:
In the Index Files field, precede index.html with index.php and after updating this field, it will look like below:
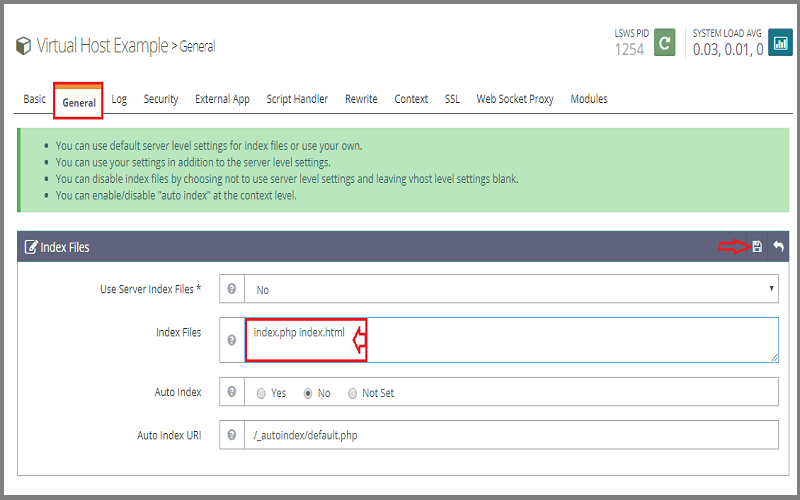
Click the Save icon before continuing.
Next, navigate to the virtual host’s Rewrite tab. Find the Rewrite Control section and press the Edit button:
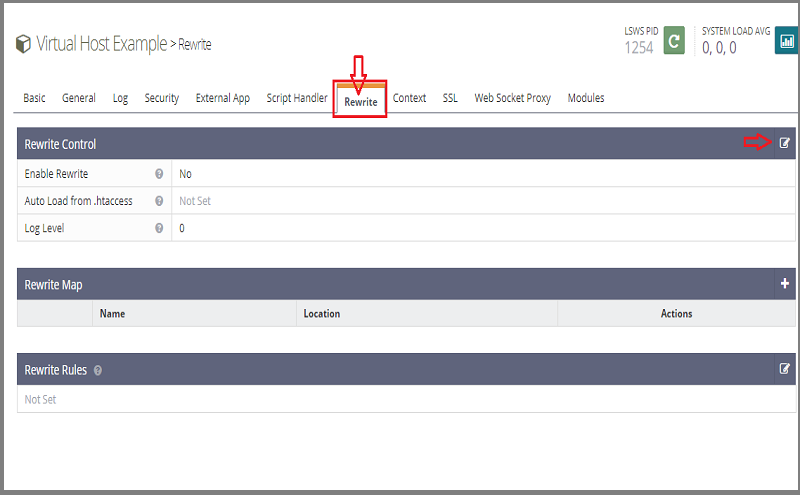
Set both the Enable Rewrite and Auto Load from .htaccess options to Yes by clicking the respective radial buttons. Configuring rewrite instructions in this fashion will allow you to use permalinks within your WordPress installation:

Click the Save icon after making those changes.
Now click on the Security tab, and then click the Delete button next to SampleProtectedArea within the Realms List table:
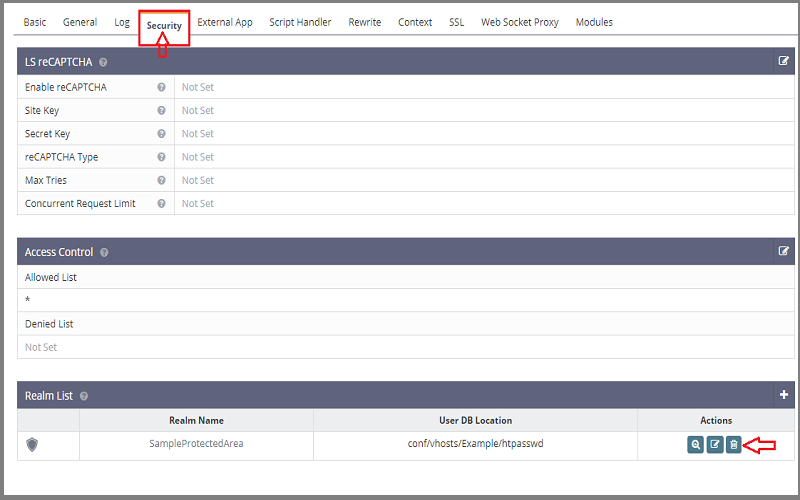
You will be asked to confirm the deletion. Click Delete to proceed.

Next, click on the Context tab. In the Context List, delete the /protected/ context that was associated with the security realm you just deleted:
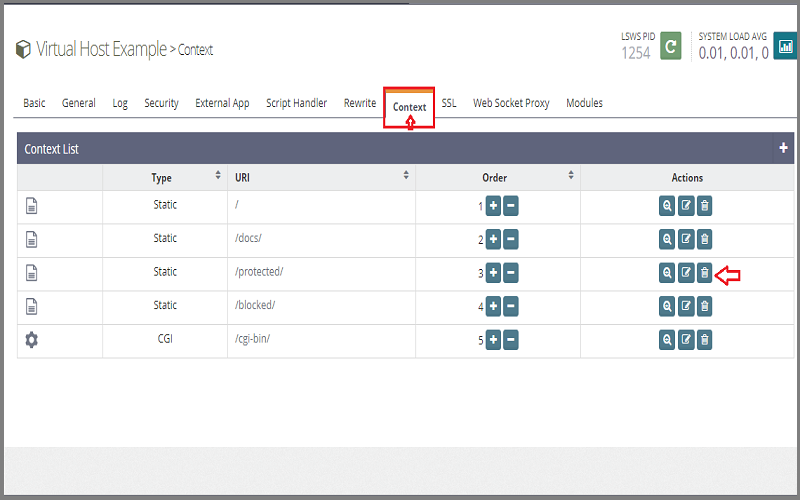
Again, you will have to confirm the deletion by clicking Delete.

Now, press the green Graceful Restart icon in the upper-right corner of the OpenLiteSpeed console. This will restart the OpenLiteSpeed server, taking the changes we’ve made into effect:


Now, you’re ready to setup WordPress in your browser.
Finishing the WordPress Installation
Open up your favorite i.e. Firefox, Chrome web browser, navigate to your server’s name or IP address:http://server_name_or_IP:8088 and select the language if it ask you would like to use:
Next, you will see the main setup page. Select a name for your WordPress site and choose a username. A strong password is generated automatically. Save this password or select an alternative strong password.
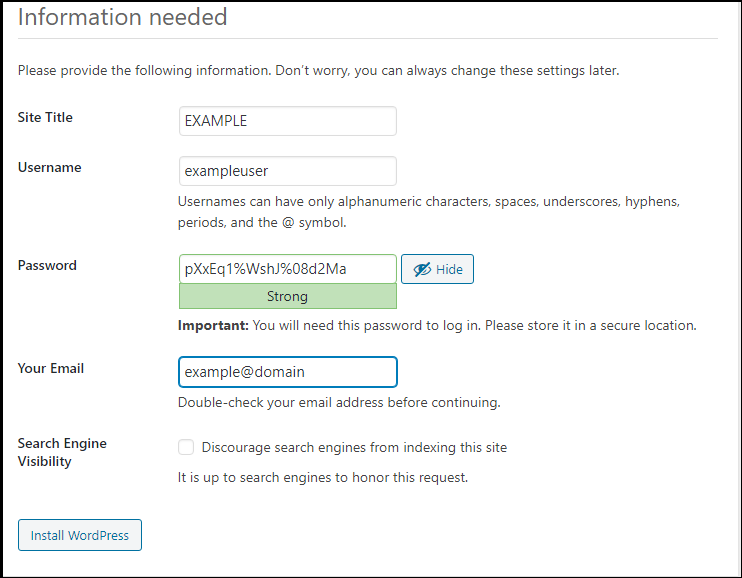
When ready, click the Install WordPress button. You’ll be taken to a page that prompts you to log in:
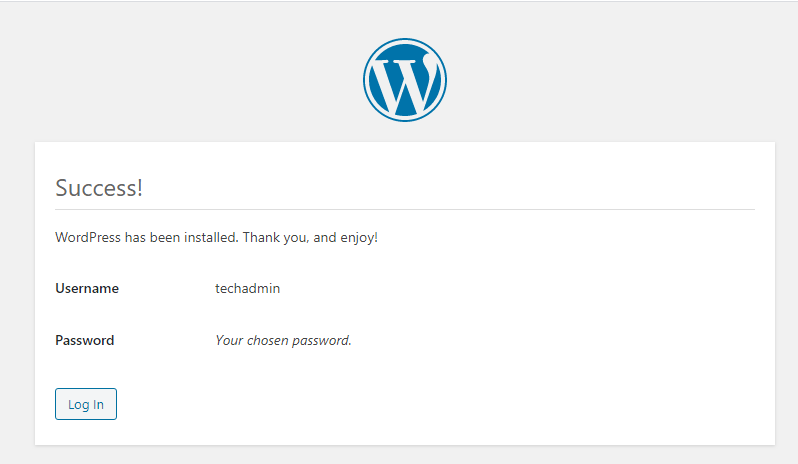
Enter your username and password to log in
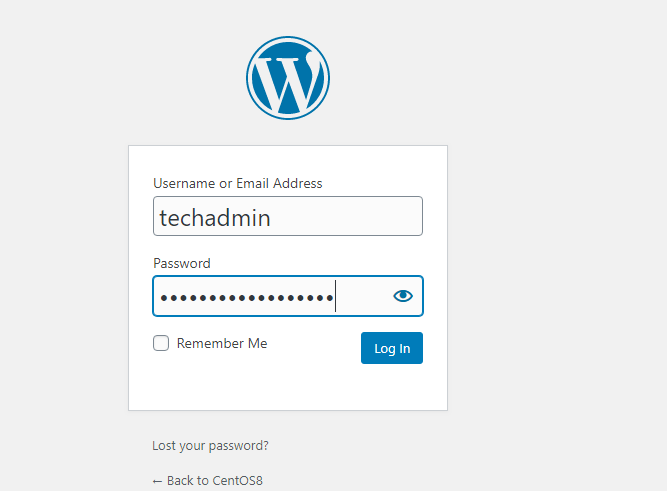
Once you log in, you will be taken to the WordPress administration dashboard:
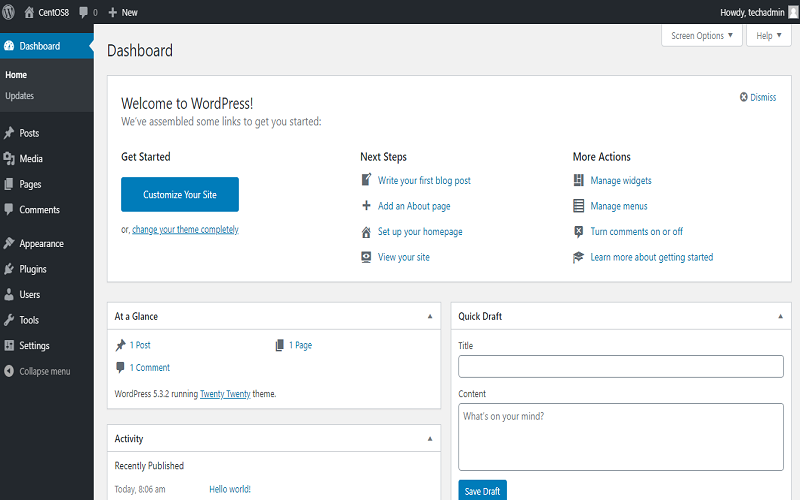
From the dashboard, you can begin making changes to your site’s theme and publishing content.

No comments: