

Requirements
- Host OS: Microsoft Windows 8
- Guest OS: Oracle Solaris 10 x86
- VMware Version: VMware Workstation 9.1
Once you have VMware Workstation installed, invoke VMware Workstation and do the following:
- Create New Virtual Machine by selecting File -> New Virtual Machine. Click “Next”, Virtual Machine Configuration -> Custom

Select Hardware Compatibility from Drop/Down list. Click "Next"

Brows for Solaris 10 Installation ISO image or select CD/DVD drive. Click "Next"

Name the Virtual Machine whatever you feel like, I named it “Solaris 10″ and click “Next”

“Number of processors ” choose “One” and click “Next”

Allocate Memory to the VM, I have given 2048M. Click “Next”

Network Connection , choose “Bridged Networking” and click “Next”.

Select I/O controller and click “Next”

Create New Virtual Disk and click “Next”

Virtual Disk Type, select “SCSI” and click “Next

Specify Disk Capacity, Choose 10 GB and Click “Next”.

Specify Disk File Name, name it differently if you wish or leave it as it is and click “Finish”.

So your VM should look like this:

Installation of Solaris 10
“Power On” the Virtual Machine

Choose “Solaris Interactive (default)” from the menu and press enter/return key.

Select Language , I have chosen “English”

Click “Next”

Select the radio button “Networked” and click “Next”

This section lets you enable DHCP, I have chosen not to select DHCP.

Enter the hostname and click “Next”

Enter IP Address, ensure this IP is free and not used by any other system.

Enter “NetMask”, I have selected it default value which was automatically picked up.

Select “Default Route”, I have selected “none” as this can be defined at later point in time.

Select “No” if you do not intend to use Kerberos Security.

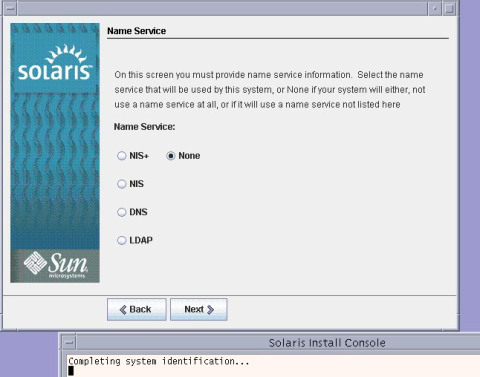
Select your desired “Name Service”, I have selected “None”
Select “Time Zone”, I chose the radio button “Geographic Continent/Country/Region”

Select your relevant country

Confirm “Date and Time” and click “Next” Enter “root” password and click “Next”

Select “Yes” if you wish to Enable Remote Services and click “Next”

- Confirm the “Summary” and proceed to next section by clicking “Confirm“
- Click “Next” to go to the next tasks of Installation
- In the “Installer Options” click the radio button “No” for Reboot automatically after installation and “No” for “Eject CD/DVD after Software Installation” and click “Next”

- A Notice will pop up to you should also eject the CD/DVD. Click “OK” to continue.
- Specify Media, click radio button “CD/DVD” and click “Next” to continue

- Accept the “License” and click “Next”
- Select “Type of Install”, choose “Custom Install” radio button and click “Next”. You can select “Default” if you like to.

Select “Software Localization” specific to your country and click “Next”.

Select “System Locale” specific to your country.

- Select “Extra Value Software Software” and click “Next”.
- Select “None” for “Web Start Ready product scan location“
- Click “Next”, I made no changes and accepted the defaults.

Confirm the disks are selected and click “Next”.

Select fdisk Partitions to be customized, check mark the displayed disk and click “Next”

Confirm the values and click “Next”.

Layout File Systems, Highlight “c1t0d0″ disk and click “Modify” to reflect the following values

And Finally click “Install Now” which will begin the installation.

The installation will take sometime to finish. Click “Reboot Now”

Login using “SUN Console Login”

You can use either “Java Desktop System” or “CDE”

The installation is Complete, Solaris 10 Fresh Install is ready to be used.

Finally you might want to configure internet to your Solaris 10 VM, to do this do the following:
- If not already created, create file “/etc/defaultrouter” and enter your routers ip address
- If not already created, create file “/etc/resolv.conf” and enter the following:
search mydomain.comnameserver ip address of DNS server
- copy /etc/nsswitch.dns to /etc/nsswitch.conf
- Restart the network by issuing the following command:
#svcadm restart /network/dns/client - Check the routing table and confirm the network is using the new sttings:
#netstat -r
If not then add the default route by:
#route add default <gateway> - Thats it you should be able to connect to the internet.
#ping google.comgoogle.com is alive#