

This guide covered most of the content on the
internal Flex System V7000 and the Brocade FC5022 SAN Switch.
Integrated v7000 Setup
If your Flex system came with an integrated v7000 use the following steps to create the v7000 cluster.- After you have managed and inventoried your chassis you will see the integrated v7000.
- From the Chassis Map view right-click on the v7000 node and launch the EZ setup
- You will first be asked to provide the superuser password.
- then accept the license agreement
- Then set the System Name and the Date/Time (it is recommended you set the NTP server just as you did with the CMM and FSM)
- You will then setup the system licenses you purchased.
- Next you can configure Email Notifications or skip this step till later.
- You will then add the enclosure.
- Next you will configure your RAID options for your internal storage.
- Once the cluster has been created you will be launched into the v7000 GUI.
- To setup the service and management IPs (if not already done within the CMM) go to Settings -> Network on the left pane.
Managing External Storage Systems w/ FSM
The IBM Flex System Manager can manage the following external storage units.- Storwize v7000 (external)
- San Volume Controller (SVC)
- XIV
- (It can also manage DS storage units but you will need an SMI-S agent configured on a separate server.)
- Log into the FSM and go to the Home tab and to Plugins
- Scroll down and click into Storage Management
- On the right hand side choose Discover Storage
- From the dropdown choose either v7000 or SVC
- Enter the IP address (For SVC also enter the version number of SVC you want to manage)
- You will also need to have an SSH public and private key pair created (The easiest tool for this is a free app called PuttyGEN)
- Place the private key into the FSM where it says ‘Upload Private SSH Key’
- On the storage system you will need to change the superuser ssh key.
- Log into the SVC or V7000 GUI and go to Access -> Users
- Right-click on the superuser user and click properties.
- Click change SSH key and place the public key in the pair to the superuser users profile.
- One both key pairs are uploaded click ‘Discover’
- Allow the job to run and make sure there are no errors
- Once complete you should see the storage system as a managed device under the storage group in Resource Explorer.

You should see your storage systems managed and in an OK state as seen below.

Upgrading v7000 Controller Firmware via FSM
In this article I will show the steps to upgrade your Flex v7000 via the Flex Systems Manager as well as any caveats discovered.If you have compliance running on your Flex v7000 then when a new upgrade is available you will see it as a compliance warning. (As shown in image below)

Click the warning link and it will bring you to the screen where you can choose your upgrade and click Install.

During the wizard it will ask you to let the test utility run ; ALLOW THIS TO HAPPEN. The test utility is critical to ensure the update will be successful.

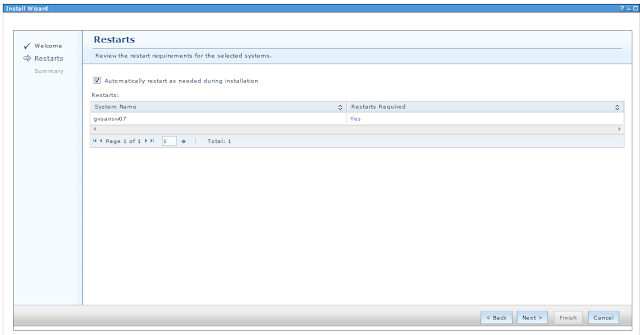
The upgrade job will need to restart the storage system. However, this can be misleading since the v7000 is a dual controller system it will simply do one node at a time so you will NOT need to shutdown your hosts for the upgrade.
On the summary screen, make sure all of the information is correct and then click Finish to launch the job and either schedule this job or run it now.

Display the job properties to see the logs as the upgrade commences (I also like to have the v7000 GUI open to view the upgrade task under Settings -> General ->Upgrade Software


******************* Warning found *******************
This tool has found the internal disks of this system are
not running the recommended firmware versions.
Details follow:
+———————-+———–+————+————-+
| Model | Latest FW | Current FW | Drive count |
+———————-+———–+————+————-+
| ST91000640SS | BD2F | BD2A | 4 |
+———————-+———–+————+————-+
We recommend that you upgrade the drive microcode at an
appropriate time. If you believe you are running the latest
version of microcode, then check for a later version of this tool.
You do not need to upgrade the drive firmware before starting the
software upgrade.
Upgrading v7000 Drive Firmware
- First go the IBM support and downloads and search for Flex v7000.
- Download the drive microcode package.
- Next either pscp or WinSCP the package to the v7000 the the /home/admin/upgrade directory.
- Then SSH to the v7000 and type lsdumps -prefix /home/admin/upgrade to see if the upgrade package is there.

- Now upgrade each individual drive (I know its really annoying!) svctask applydrivesoftware -file IBM4939_DRIVE_20121210 -type firmware -drive 0
- To see if each drive has been update type LSDRIVE 1
- When every drive is updated try to run the update again.
Mdisk Pools/Adding New Drives
For this article I will be adding new 900 GB drives to my Flex Systems V7000 (internal to the chassis). We will be using RAID5 and the best way to group disks for performance is 8 disks to make an mDisk. An mDisk is a managed disk group or array of disks that can then be added to mDisk pools.- First go to your v7000 cluster GUI and go to Pools -> Internal Storage.

- Next physically add your drives to the v7000.
- Once the drives are added you should see the new drives, separated by drive type, and listed as ‘unused’.

- Now click the box on the upper left that says ‘Configure Storage’. Choose the RAID type you want and whether you would like to create hot spares. Allowing the IBM recommendations to be run is the best practice. Also, one hot spare per enclosure is enough to keep the recommended fault tolerance to the mdisk arrays.


- Once the job runs the wizard will ask you to either create a new pool or to add to an existing pool. (For my configuration I added the 900GB 10k SAS drives to an existing pool and for the 1 TB 7.2k SAS drives I created a new pool with 2 mDisk arrays per IBMs recommendations).

Once you have mDisk arrays and mDisk pools created you will be able to create vDisks or logical drives from them.
Brocade FC5022 Configuration
Upgrading Brocade FC5022 Firmware via FSM
NOTE: DO ONE SWITCH AT A TIME.


 Verify in the confirmation screen that the information looks correct and click ‘Finish’.

Next either run the job now or schedule it for a time during your maintaince window.
- First find the compliance war
- Click the ‘Minor’ link
- Now select the update and click ‘Install’
- The switch will need to reboot during the upgrade but as long as the other fabric aka SAN switch is online and healthy then this will not be a problem..
Now display the properties to watch the job run
Watch the logs for errors.
When the job completes, verify the SAN switch inventory reflects the new firmware.
Watch the logs for errors.
When the job completes, verify the SAN switch inventory reflects the new firmware.
Next either run the job now or schedule it for a time during your maintaince window.


No comments: