
This
guide will show you how to integrate Azure Active Directory
authentication in Apache and enable single sign-on (SSO) for your
cloud-based systems, software and applications.
SSO is
a property of access control of multiple related, yet independent,
software systems. With this property, a user logs in with a single ID
and password to gain access to a connected system or systems without
using different usernames or passwords, or in some configurations
seamlessly sign on at each system.
Apache is
the most widely-used web server in the world. It provides many powerful
features including dynamically loadable modules, robust media support,
and extensive integration with other popular software.
Mellon is
an authentication module for Apache. It authenticates the user against a
SAML 2.0 IdP, and grants access to resources depending on attributes
received from the identity provider (IdP).
Azure AD
is Microsoft's enterprise cloud-based identity and access management
(IAM) solution. It can sync with on-premise Active Directory and provide
authentication to other cloud-based systems, and applications via
authentication protocols like OAuth2, SAML, and WS-Security.
Prerequisites
To
follow this tutorial along, you will need one (physical or virtual)
machine installed with any of your favorite Linux distribution like CentOS, RHEL, Fedora or Oracle Linux. This guide also assume that
your Azure Active Directory has already been properly configured.
Install Required Packages
Login to your Linux system with a non-root sudo user privileges and install these important packages:
Configure Mellon
Create a directory under /etc/httpd/ location to store your mellon metadata files:
Execute below script to generate mellon metadata files:
You should rename these three files like below:
Create a mellon configuration file like below:
Enter configuration directives like below:
Save and close the editor when you are finished.
Type below command to generate a self-signed SSL certificate:
Enter appropriate information on the following prompts:
Create a Apache configuration file:
Enter configuration directives like below:
Save and close the editor when you are finished.
With this configuration, we secures everything under /protected on mywebserver.example.com, providing access to all valid IdP users.
Create a directory under your Apache document root folder like below:
Create a directory under your Apache document root folder like below:
Create a simple index page like below:
Enter a simple html code like below:
Save and close the editor when you are finished.
Verify your Apache configuration with below command:
Verify your Apache configuration with below command:
If everything set up correctly, you will see Syntax OK in the output. If it returns any configuration error, fix them first then proceed to next step.
Activate your Apache configuration with below command:
Activate your Apache configuration with below command:
Configure Azure AD
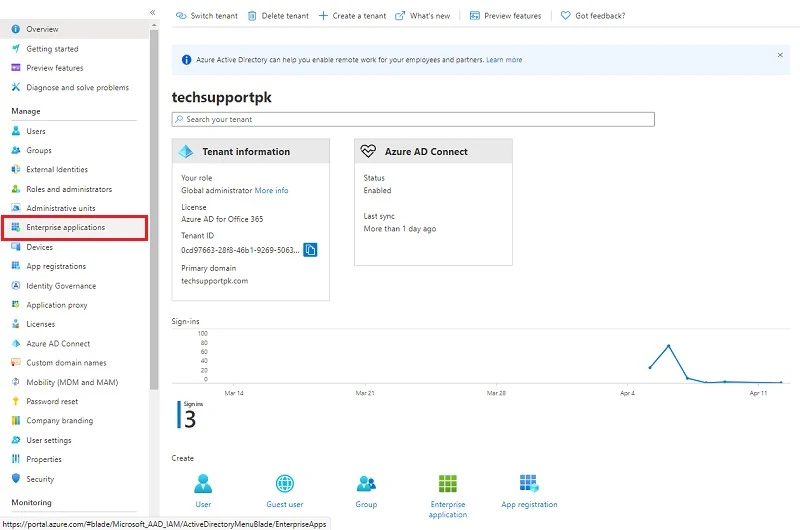
Log in to your Azure portal and perform the following steps accordingly:Navigate to Azure Active Directory > Enterprise application
Click New application

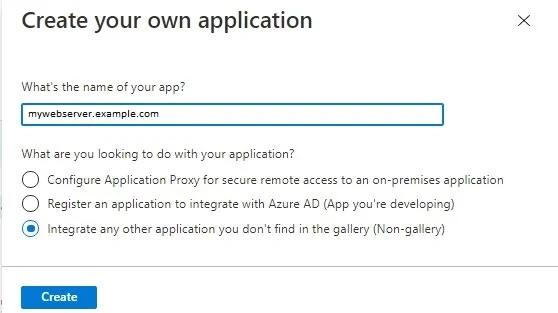
Click Create your own application

Give a name to your application, or simply enter URL of your application in the box. Select Integrate any other application you don’t find in the gallery (Non-gallery) from the option.
Click Create
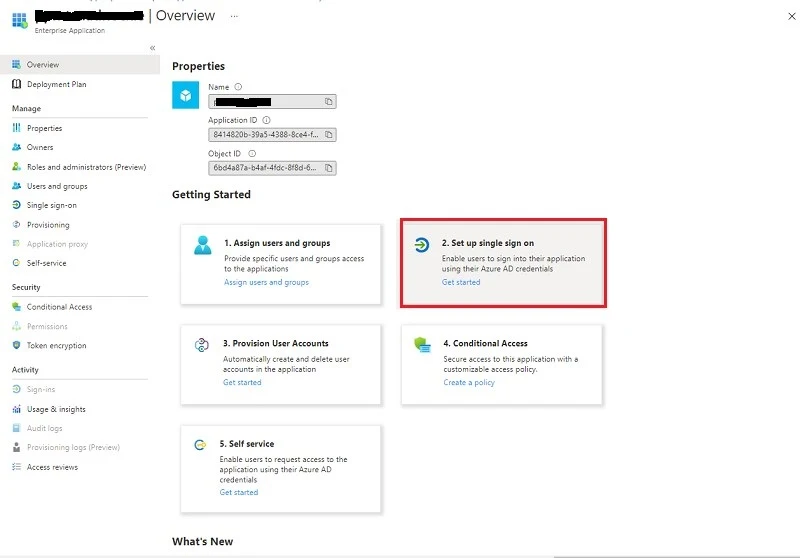
Click Set up single sign on
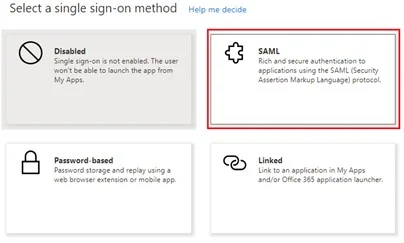
Click SAML
Click Upload metadata file

Click Browse

Select your mellon_metadata.xml file. If you remember, this file is created and stored on your Linux system under /etc/httpd/mellon/ directory.

Click Add

Click Save, then click × sign to close Basic SAML Configuration screen.

Click No. I’ll test later

Scroll down to Download Federation Metadata XML file from the SAML Signing Certificate section.

Save this federation metadata xml file and rename it as AzureAD_metadata.xml
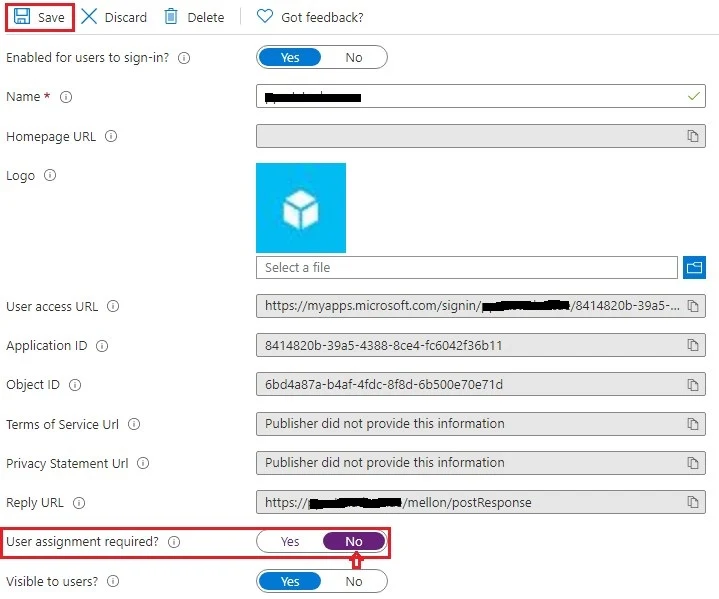
Next, navigate to Properties

Change User assignment required from Yes to No, click Save
Next, copy AzureAD_metadata.xml file to your Linux system's /etc/httpd/mellon/ directory.
Restart Apache service to take changes into effect:
Open up a web browser and enter the your url like https://mywebserver.example.com/ in the address bar.
If everything was set up correctly, you will be redirected to your Azure login page.
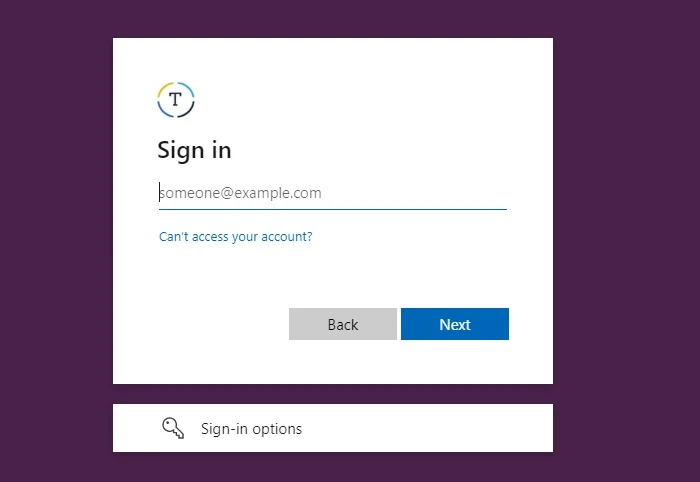
When you sign-in with your valid credentials, you will be bounced back to your simple index.html page.

At this stage, your Azure AD integration in Apache on your Linux system successfully completed.
Conclusion
I hope this guide was helpful to integrate your Azure AD authentication in Apache on your Linux system.
Execute below script to generate mellon metadata files:
ReplyDeletesudo /usr/sbin/mellon_create_metadata https://mywebserver.example.com/ "https://mywebserver.example.com/mellon"
This is not working getting this error.
sudo: /usr/sbin/mellon_create_metadata: command not found
Possibly script path has changed, run below command to find the correct path of the mellon_create_metadata script:
Deletesudo find / -name mellon_create_metadata
Then run mellon_create_metadata script again with valid path.
/usr/libexec/mod_auth_mellon/mellon_create_metadata.sh
Delete/usr/libexec/mod_auth_mellon/mellon_create_metadata.sh
Delete